Showing posts with label negatives. Show all posts

Thursday, 11 June 2015

Movement image printing

My first test strip was very light at the beginning of the 5 second intervals, grade 3 and very quickly became black as the increments went on. So I have reduced the F stop down to the second lowest which allowed a lot more time to expose my image. However the contrast wasn't dynamic enough to emphasis the shapes and lines that the model made. I changed the grade up to 4 which produced very strong signs that the exposure was between 25 and 30 seconds so I produced a confirmation strip at 27 seconds.

This looks very promising however near the edge the whites are fading into mid tones. I think I will have to hold back areas of the image to make sure they are lighter. I cannot tell where I will have to hold back thought without a full sized unaffected image.

This image shows how in the top half the whites are more grey so a lot of this area will need to be held back, however I will have to be careful with the arms not to erase them from the image. I also notice how the lower half of the models body becomes very pale compared to the upper half so I could hold that back as well just a little to decrease the contrast.


This second print is exactly what I wanted to achieve. I have reduced the amount of greys in the top half whilst avoiding the arms and the lower part of the model is slightly darker.


Tuesday, 2 June 2015

Printing the multiple exposure from first shoot

The test strips I have done tell me that to get black I will need a high grade and around 35 seconds of exposure. However when creating the print I found that this grade was too intense and almost got rid of all the mid-tones in the image.

Due to this I have decided to turn down the grade to 3 which will fill in the blacks and form the image. This will then require me to use split grade printing to fill in the mid tones of the image. Test strips indicate 30 seconds at grade three and 8 seconds at grade 00. There are hairs and dust in this print so I will have to clean the negative with a fine brush and I will retry.


After the clean, the print still shows that there are hairs on the negative and there are chemical stains on the left of the image so I will have to try again.


I have reviewed the prints I made during the last session and I now think that the prints are too dark so I am going to reduce the high grade exposure to 25 seconds, which looks a lot better, however new hairs have appeared.


I have cleaned the negative again. Another different problem occurred again, it seems that the border template might have been raised slightly and has created a soft edge on the image. I will have to hold it down next time.


 I have finally been able to make the print that I intended to. There are only small marks and the paper is slightly wrinkled so I may have to learn and practise how to analog spot with paints to camouflage them; and get it heat pressed flat. Since as it took a lot of mistakes to get to this point I have a lot of material that I can use to develop my spotting skill.

Monday, 1 June 2015

Printing with sandwiched negatives

From my test and confirmation strips I have determined that I will need to expose this image for around 35 seconds at grade 2.5. As my strips dried they fell of the wall and onto a bench worktop. When I picked them up I realised that they had patches of gloss. This really surprised me since as it is matt paper, maybe there was something on the worktop that left chemical residue on the paper and dried glossy.
Gloss on left.
 Gloss on left.
Gloss on lower right corner.

This is my first full sized print. It doesn't look too bad, one of the negatives is placed slightly too far into the other image and looks strange, I feel that there is too much white, I may have to split grade print. After repositioning I have quickly gone over the negatives with a fine brush to get the dust off.

The second print looked a lot better. I switched the grade 2.5 exposure to 30 seconds and 5 seconds at grade 00, however I think it still needs slightly more mid tones, I will try 27 seconds to 8 seconds.

Both prints 1 and 2 fell of the drying cord overnight which has dented a corner on both. Print 2 was face down on the floor. Something has effected print 2 whilst drying, it looks like chemical burns, possibly bleach that is used to clean the floor. Overall more pegs are required to hold the weight of the paper and water.


Print 3 has a lot of dust and hair marks from the negative so I am going to have to clean them again. However the paper is quite flat, this may be the best method to dry them.


I am starting to get a little frustrated with this print because I am using a lot of paper and time, I am going to make everything perfect with this print. I have cleaned and positioned the negatives correctly. I washed my hands before I handle the paper out the bag, expose the image and slide it into the developer. I stood with the trays and gently agitated them, just before I have to transfer it to the stop I wash my hands again, then I stay with it, wash my hands again before sliding it into the fix. Once again washing my hands before popping it in the wash. I am putting it in the wash upside down since as the paper floats so that I know it is completely washed. I left it in the wash for at lest 30 minutes before taking it out to view. So far it looks almost perfect, there are 3 small dust marks but they are unnoticeable from a distance. Hopefully it dries correctly.

Which it has, the print is relatively flat and has barely any marks or stains. I am very pleased with this final outcome.

Sunday, 31 May 2015

Printing

I have decided that I am going to do the printing myself which means that I will have to buy very big paper and for greater quality I will also have to use fibre based paper. FB paper is very sensitive to touch, flexing and chemicals so I will have to be very careful with it. 

I have decided that due to limitations in the darkroom and cost I am going to buy and use this paper. However I don't think that I need 50 sheets. As I was talking to a tutor she showed interest in it and proposed to split the price in half for half the sheets; I agreed to this proposition.

FB paper has a tendency to curl and wrinkle as it dries so if I can make it dry as flat as possible and get it heat pressed onto a mount board with an adhesive tissue in between then it shouldn't be a problem.

Saturday, 30 May 2015

Fifth Shoot

Using a Bronica ETRS medium format camera I was able to produce 15 images.
I find that the multiple exposure images from this shoot was simply too surreal or gave the wrong message to the audience however the motion images that I have experimented with are very strong. 13 and 14 are too detailed and show the identity of the model which isn't what I wanted and 12 was poorly timed. However 11 was perfectly timed, doesn't show details and has stages in the exposure giving it the impression of a multiple exposure instead of a 1 second exposure.

Forth Shoot

I was using a Bronica ETRS medium format camera. Very few of these images were exposed or developed successfully.

From this I found that it would be a lot harder than expected to take strong images as a lot of these are much too confusing, I would class most of them as surreal pieces. Some of them have a strange bubble effect over them which is most likely from the development stage. If not enough developer was used then this might happen. Since as I cannot confirm how this effect occurred and most are not as strong as previous images I have taken so I won't be using any of these.

Friday, 29 May 2015

Third shoot

I wanted to test some film that I have never used before because of work by Paul Himmel where the grain makes a texture on the image and diffuses the detail in the image. I was using Ilford Delta 3200 on my Olympus OM10 35mm camera. Due to the effects that appeared during the last shoot I was really interested to see the result. 


These show that the camera still works as it should and the effects in the last shoot must have just been an anomaly. Attempting to recreate some of Himmels work was unsuccessful so I decided to attempt my own style again. Two images have appeared to be quite strong however I am unsure if they are strong enough. 

 I find this image very angelic if you take it that the hand is her own. If not; and you take it as it is someone else's hand I think this image becomes quite sinister. It feels like someone is trying to claim her or take the innocence from her. This could even be interpreted as a child becoming a woman.

I really like this image because of it's simplicity. The subject is only on the right leaving the left as space to emphasis the importance that her standing there might communicate. Focus on the subject is very soft, which is a feature of the film and the amount of grain that it produces. I think that it might have been more effective if I hadn't cut the models curve off the edge of the frame but I still think its very effective.

These images are still too similar to the sort of work I have previously produced. I think that I will continue with the multiple exposure work as the images are very strong, appealing, test my ability on taking the images and selecting which are best overall.

Wednesday, 27 May 2015

Second shoot

During this shoot I was using a Fujifilm OM10 35mm camera with film I have used before. However something has happened inside where a large portion of both rolls of film has been exposed to light causing anomalies on most of the images. This might be because the door wasn't shut properly or some dust stopped the door from shutting as I know the camera works because of recent use. Some of these images are made stronger by this occurrence however I don't feel that I will be able to produce this result again and therefore I don't think that these images are appropriate for this assignment.


Experimenting with Shoot 1

Since as the double exposure was so effective I want to try overlapping my images digitally.
To make this image I have used 4 different images and adjusted opacity levels on every image whilst having a base image at 100%. I dislike this image because the more images I started to add the more it seems to just turn into a 'mush' of greys because of the blacks and whites overlaying each other. Doing it digitally is very different to in camera methods because it uses the black areas to expose the next image whilst digitally it just adds everything together.

Since as using different images didn't work I am wondering if using the same image placed differently will make any difference.
The greyness of the image is quite different as there are very defined whites and blacks however the image isn't the right choice as I think there needs to be more going on.

I have chosen an image with more lines and shapes however it still looks strange because all the main features blend together. To me it simply looks like a dodgy job on taking an image and editing it.

I really dislike using Photoshop for this work because it doesn't produce the appeal that a real double exposure would on film.

I am wondering if I could use several images from this set in an enlarger and create a multiple exposure through to the print.
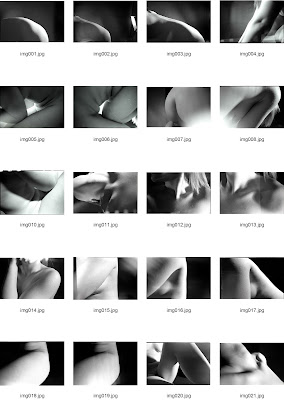
I am very impressed with this piece as there are whites, blacks, mid-tones and the images match up really well. It looks like the two hands are trying to reach out to each other because the body and arm also looks uncomfortable suggesting that one person needs help. I used img10, img15 and img23 from the contact sheets. It was a 22 second exposure at grade 4 and a 7 second exposure at grade 00. This is called split grade printing. Split grade printing is usually used when a negative is especially hard to achieve blacks, whites and the right mid tones. First expose at the high grade to define the depth of the blacks and then expose the low grade to fill in the mid tones in areas where there should be detail.

Monday, 25 May 2015

First shoot

Using a Bronica ETRS medium format camera I was able to produce 38 images. Using meduim format allows me to scan and print my images a lot larger than the conventional 35mm.


I feel that I have produced some strong images from this set however they are very similar to the sort of work that I produced in my last assignment where I studied the female form. The image that really caught my attention was the second image. A double exposure. Maybe I should research into this and practise this again.